| STEP 1 | STEP 2 | STEP 3 |
| → How to open account with GoToNative? | → How To Create Campaign & Ads? | → How to add funds to advertiser’s balance? |
After you’ve created account with GoToNative like we’ve explained in the previous STEP 1 How to open account with GoToNative?, the next step is to create your first Campaign and add some Ads into it.
First, log in to your GoToNative account, from the main login page:
https://app.gotonative.com/auth/login/
Enter your email and password with which you have registered in the corresponding fields and click on SIGN IN
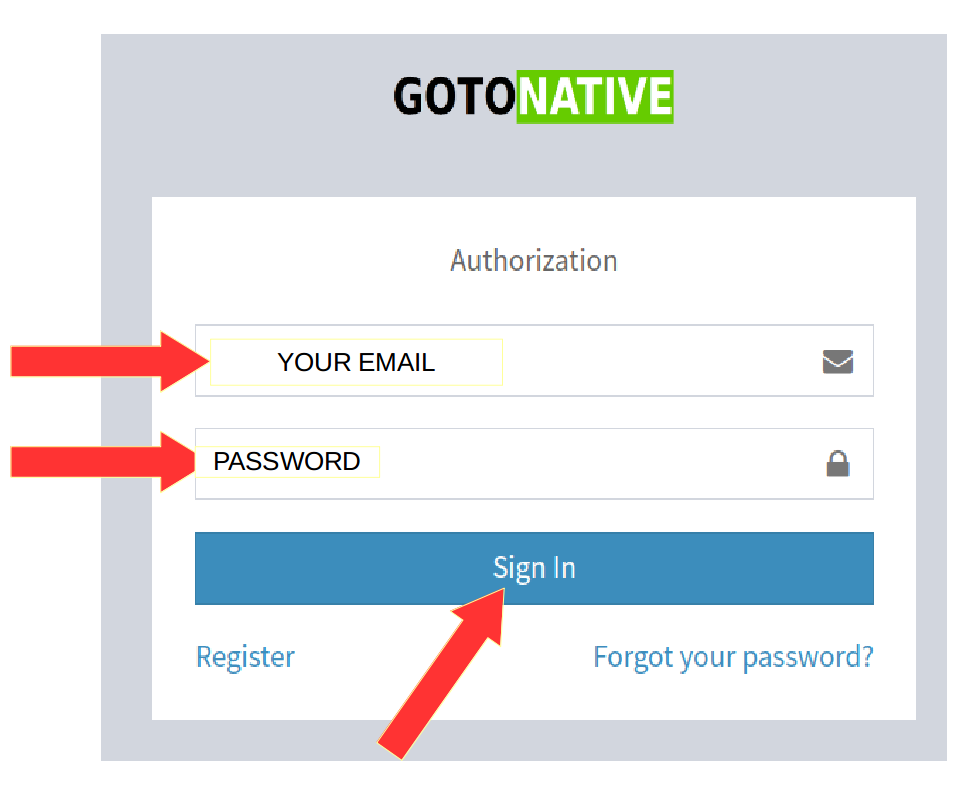
If you have forgotten your password, click below on Forgot your password? to get an email with password reset link.
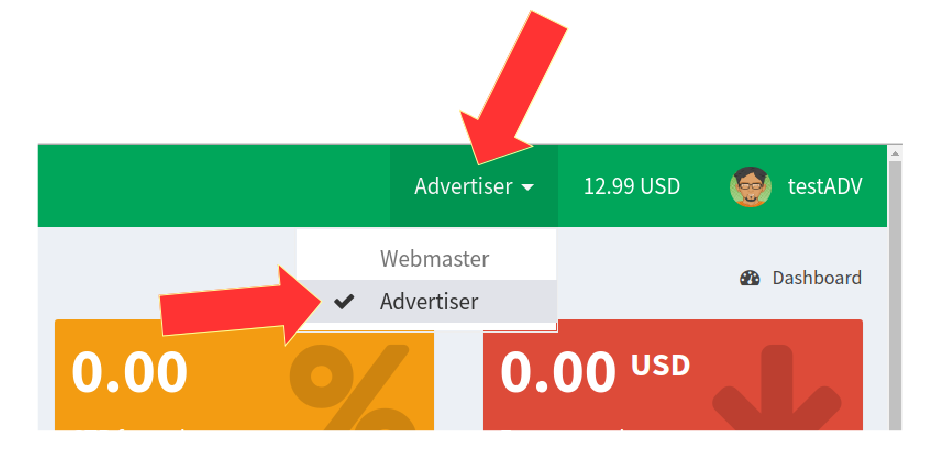
Switch to the ADVERTISER account. With one account, all our users get access to both of our platforms – the advertiser’s account (“Advertiser”) and the publisher’s account (“Webmaster”). This allows you to use our platform for both purposes if you wish.
Switch between Webmaster and Advertiser account from the top of the screen
Logically, in order to advertise, we need to be in the advertiser’s platform (“Advertiser”).
CAMPAIGNS
If you’ve ever used Google or Facebook Ads or other native Ad networks, you’re already familiar with the CAMPAIGN -> ADS concept.
CAMPAIGN is a collection of multiple ads. Within CAMPAIGN you set targeting options, for example based on the visitor’s device – mobile, desktop or both, at what time, on what days, from which countries you want visitors to your Landing/Sales page. Any CAMPAIGN-level changes will apply to ALL Ads within that CAMPAIGN.
AD is a part of the specific campaign. Each Native Ad consists of an IMAGE and TEXT below the image, as well as the LINK to your Sales/Landing page that will be shown to the person who clicked on your ad. There can be just one or many Ads within one CAMPAIGN
Just to remind you Native Ads look like this:
Let’s add first Campaign
After you switch to ADVERTISER dashboard, click on the CAMPAIGNS menu on the left. At the page top click on + ADD CAMPAIGN
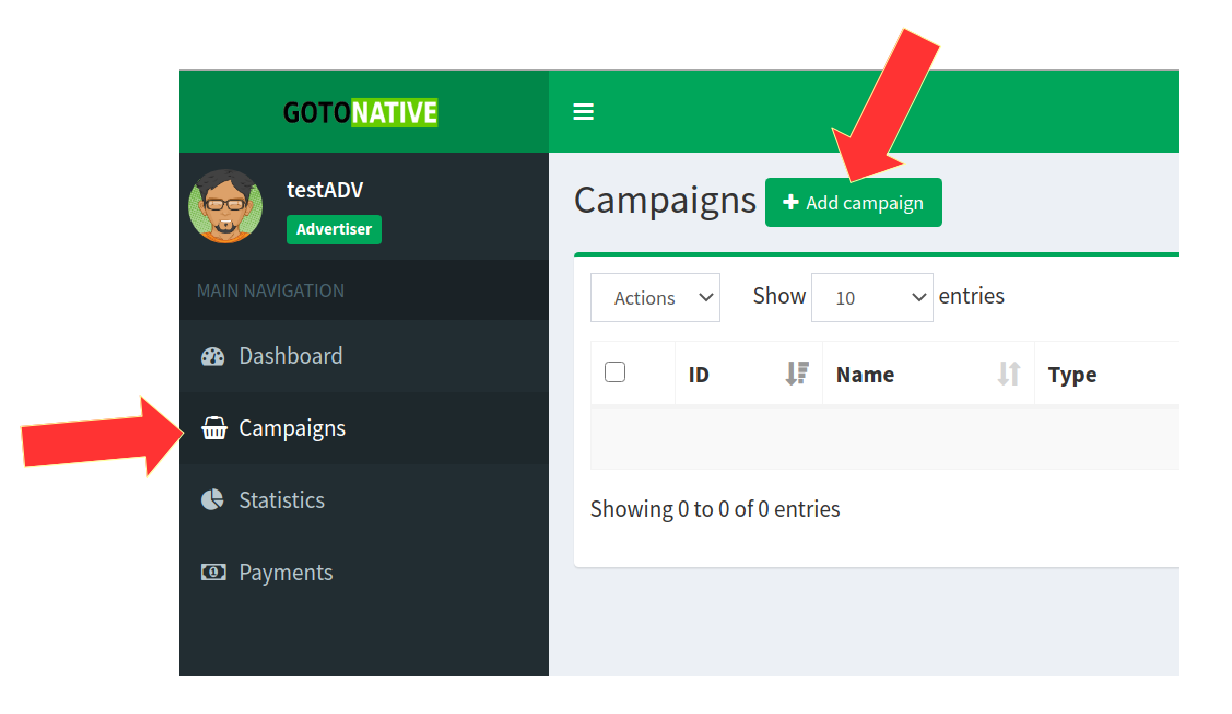
After clicking on +ADD CAMPAIGN at the page top, a new window will open in which you can first name your Campaign. This name will not appear anywhere in your ads, it only serves you internally, to help you navigate through Stats if you run multiple ad campaigns.
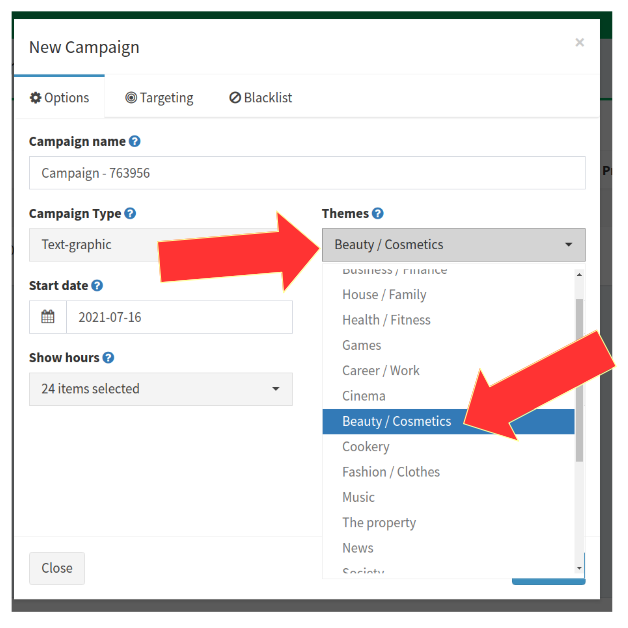
Select TEXT-GRAPHIC campaign type. These are “native” advertisements.
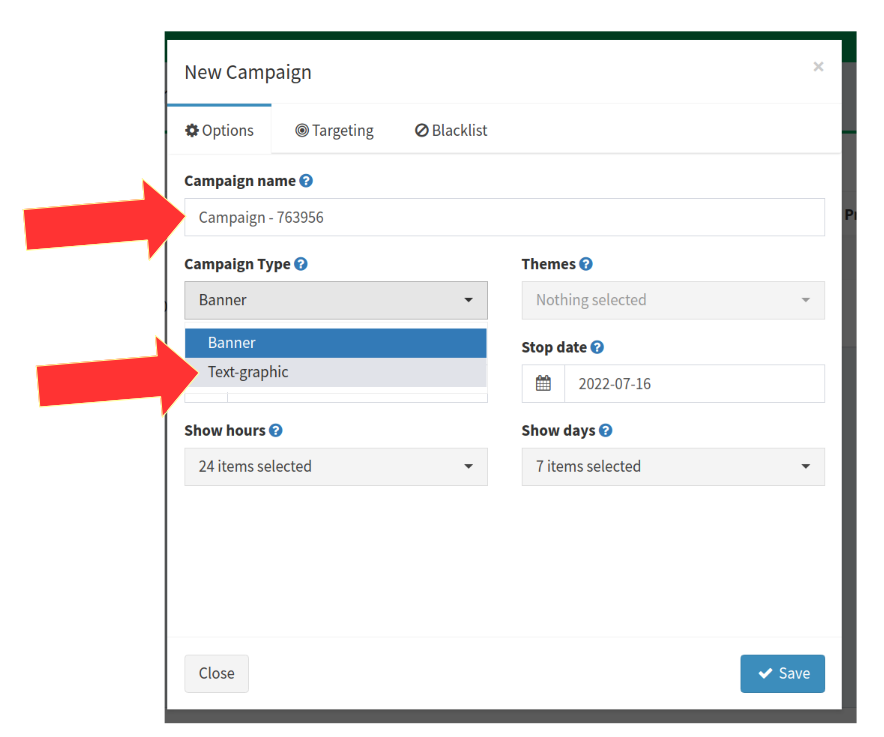
Select the TOPIC of your advertising campaign, by choosing one of the topics from the drop-down menu.
Choose the topic that best describes the product or service you want to advertise.
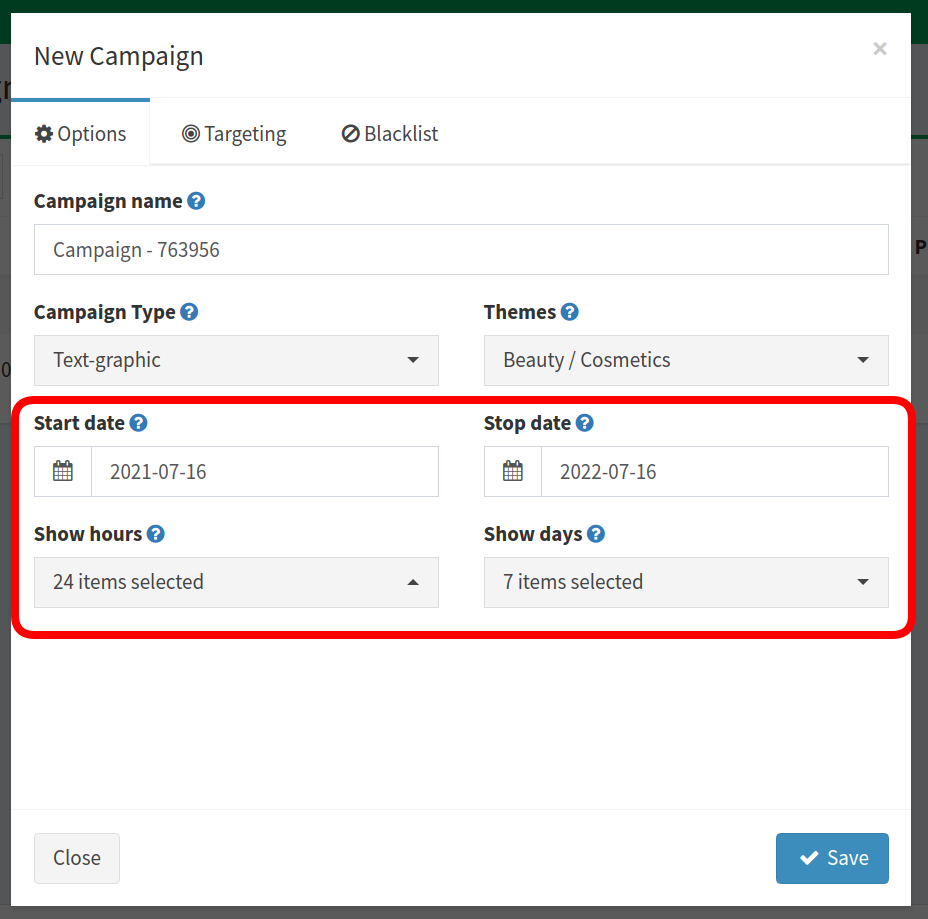
Next, choose when you want your ads to start and when you want them to stop automatically (set to 1 year in advance by default).
You can also choose what hours of the day you want your Ads to run. Let’s say only in the morning, only in the evening, or throughout the whole day. As well as on which days of the week, say only on weekdays, only on weekends, or on all days.
In the NEW CAMPAIGN window switch to the TARGETING tab. There you can set to WHOM your ads will appear.
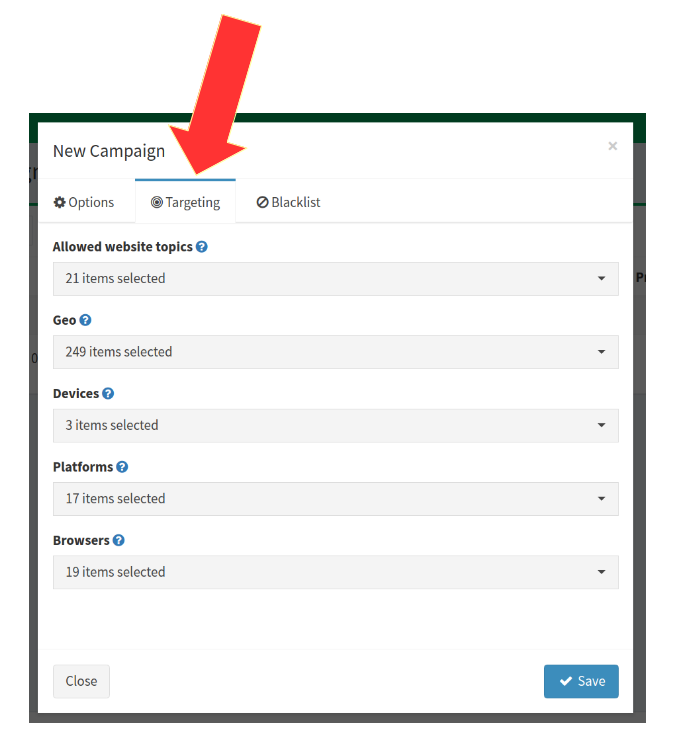
It is important that you set the TARGETING options correctly in order to show your ads only to the right group of people, who might want to buy your product or service.
Allowed website topics – default is all site categories except “Adult”. We suggest to start with ALL categories.
Geo – is for selecting the countries from which you want visitors. Default is ALL COUNTRIES. Be sure to change that and choose only one country, or several, country(es) where you can actually sell your physical product or perform a service. Unless, of course your service is available everywhere in the world, like digital goods – software, music, games etc…
Devices – by default, ALL devices – desktop PC, mobile phones and tablets. In most cases, you don’t have to change that. But if, for example, you are advertising a game for mobile phones, it is logical that you will turn off the desktop PC. Or the opposite, for example if your sales page is not optimized to display nicely on a small mobile screens, then you can turn off mobile phones and leave only the desktop PC
Platforms – is for picking up operating system(s) of the visitor’s device(s). Default is ALL operating systems. But let’s say you promote iPhone (iOS) game, it is logical that you do not want visitors who access the Internet using a computer or Android phone, so you will un-select unwanted operating systems.
Browsers – is for selecting the internet browser(s) through which the visitors who should see your Ad(s) accesses the Internet. By default, ALL BROWSERS are selected. But let’s say if your site doesn’t display nicely in all types of browsers, you can turn off some of them.
ATTENTION! The GoToNative platform cannot be held responsible if you have not set targeting correctly. GTN is a self-service platform, we don’t manage your campaigns, you have a total freedom to pick the options how you believe will be best for you. For example, if you sell a face cream that you can only deliver in Slovakia, but you’ve left GEO targeting to all countries you will get clicks from all over the world and thus spend your advertising budget unnecessarily. So be careful when choosing targeting options. Watch closely click statistics from your GoToNative advertiser’s dashboard on a daily basis, Change your targeting if necessary, pause/change campaigns that don’t deliver results.

The last card is BLACKLIST. You can leave that blank for now. On that TAB, in the field below, enter, one by one, the web addresses of publisher’s sites where you do NOT want your ads to appear. That is why it is called BLACK list. To know what these low-profitable domains are, it is necessary to use tracker, such as BeMob. You can’t know this information without a tracker. Using the tracker allows you to find out much more details about the visitors you get. GoToNative platform allows you to get this information in your tracker via Tracking Tokens. Here is the list of our tokens GoToNative Tracking Tokens
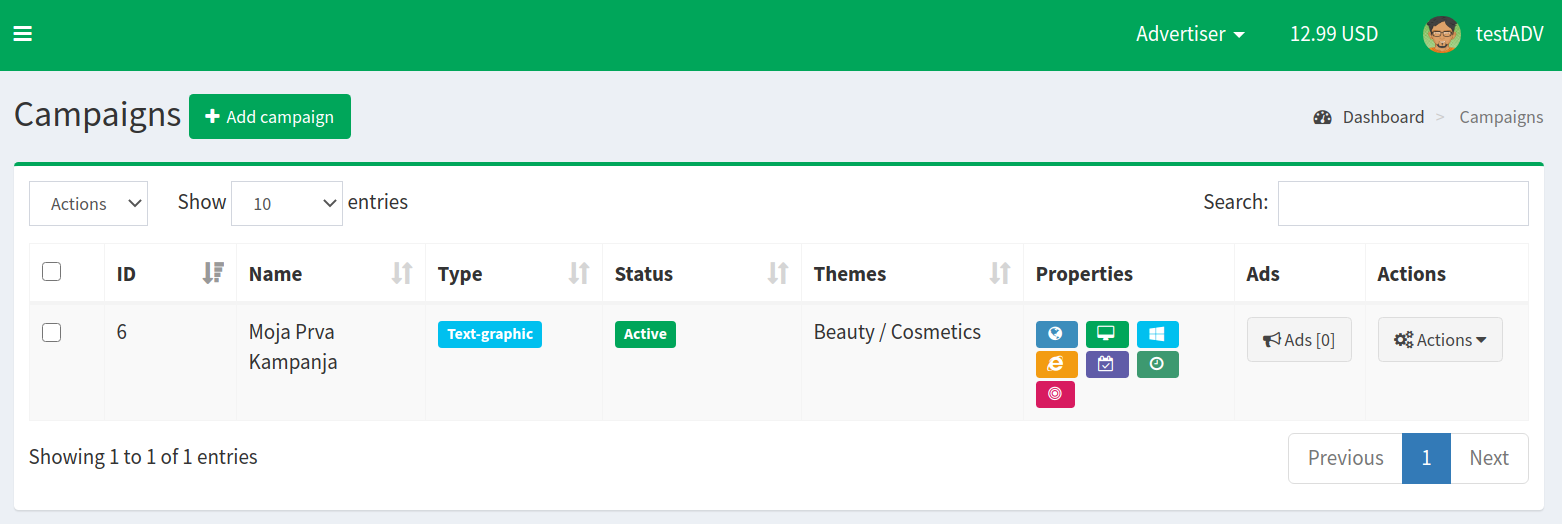
After you’ve set all the options as you wish, click SAVE to save the campaign. Then click on CLOSE to close the add campaign window.
The campaign will appear on your list in your GoToNative advertiser dashboard. The next step is to add specific Ad(s) to the campaign.
Adding Ad(s) to the Campaign
To add an Ad to a specific Ad Campaign, click on ADS button on the right to campaign name.
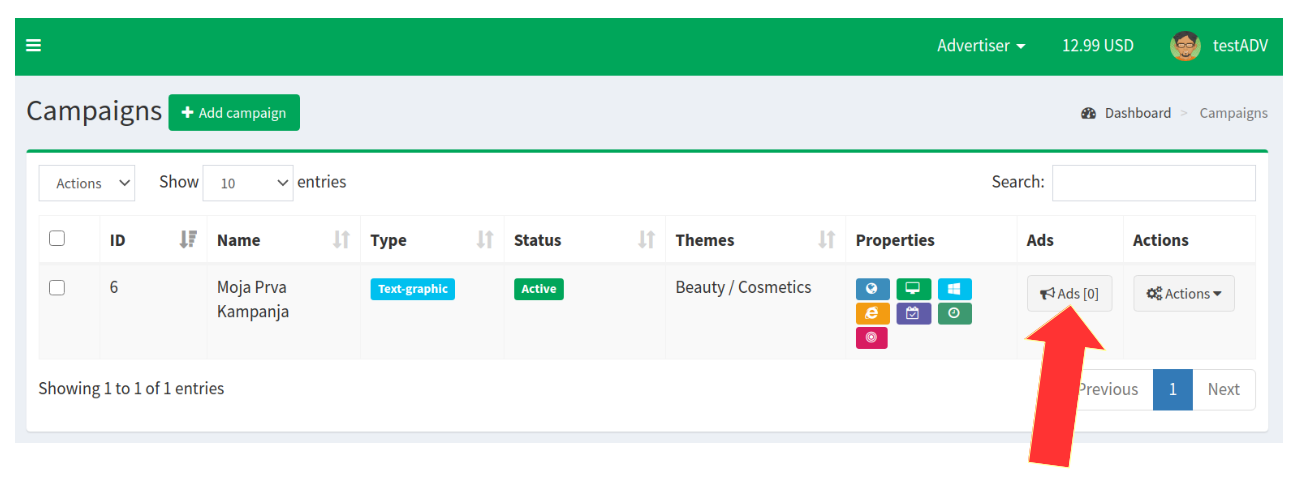
A new page will open with a list of all Ads within that specific Ad Campaign.
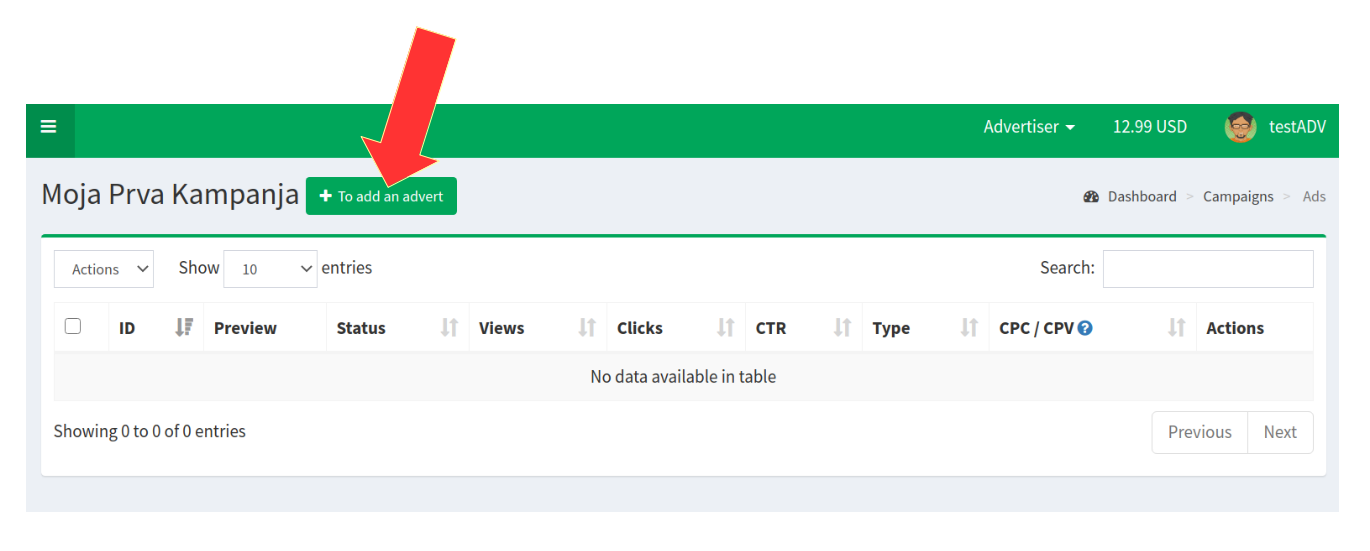
Page is empty because we have not yet added any Ads to the observed Ad Campaign. To add some Ads click on the green button +To add an advert
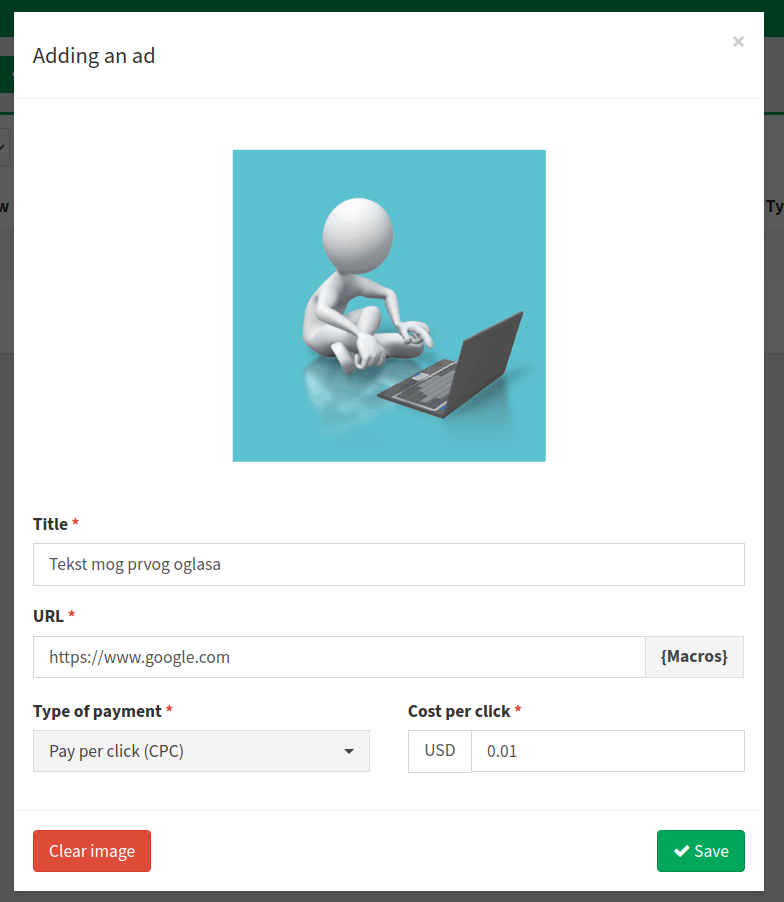
A new window will open to add 3 elements of Ad:
- Ad image 400 x 300 px
- Ad text that will appear below the Ad image
- a link to our site where we offer our product or service, our Sales/Landing/Pre-Landing page
Ads on web publisher pages look like this:
The link is not visible on the ad itself, but when someone clicks on either the image or the ad text shown below the image, your sales page will open for them to read more about your offer.
Adding Ads is easy, just insert a prepared image from your computer, type in the text of the Ad and a link to your sales page.
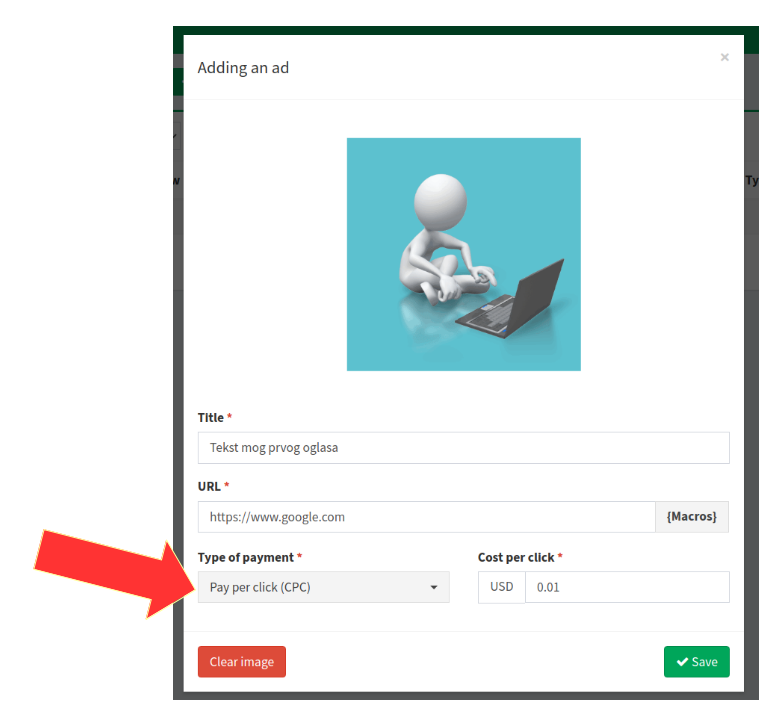
You can also choose two advertising models
#1 pay per click (CPC – Cost Per Click) – you pay for each click on your Ad(s) the price you set in the Cost per click field. The default is $ 0.01 ( 1 dollar cent ). We advise you to consider the recommended prices depending on the country in which you are advertising. With a higher price of a click, your advertisements will be displayed on a larger number of sites. You can start with 0.01 USD, but if you see that you are not getting enough visits, increase the price later.
#2 pay per view (CPV – Cost Per View) – you pay the price you set for every 1000 impressions. However this model is not so popular nowadays, most advertisers use #1 – CPC due to easier cost control and the better quality of traffic.
Macros are optional, you only need them if you use a click tracker. More info about “macros” – “tracking tokens” as they are also called, find here – GoToNative Tracking Tokens
Clicking SAVE will save the Ad you just entered.
Clicking CLOSE will close the window for adding Ads if you do not want to add more. You can always add more Ads, or edit / delete existing.
You can add more Ads to the Campaign by clicking the blue +Another button.
If you want to EDIT an Ad, you can do so via the ACTIONS option on the right side of the observed Ad.
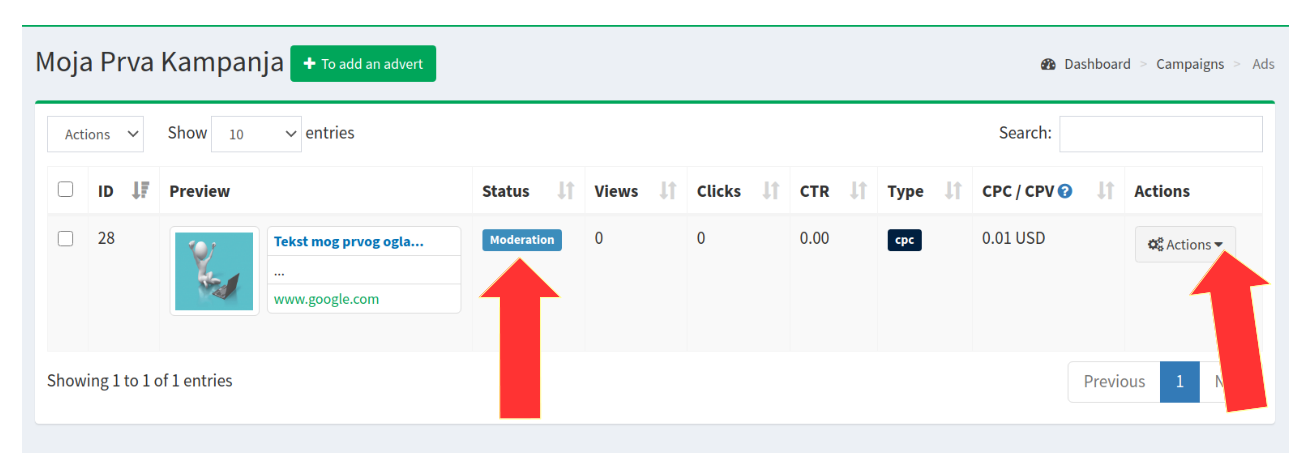
Newly added Ads will have to be checked by our moderators and pass moderation. You will need to wait for the GoToNative moderation team to review your Ad.
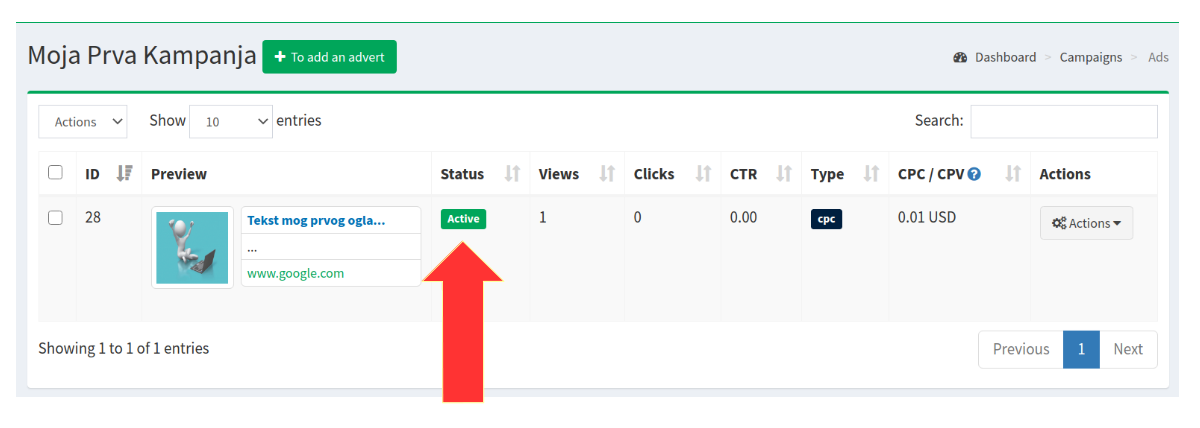
Once your Ad has been reviewed by our moderation team in your GoToNative dashboard you will see that Ad in ACTIVE status, if Ad was accepted. Or, BANNED if Ad was rejected. ACTIVE Ads will start running immediately if you have money on your balance. If the Ad is rejected, ie. in the BANNED status you will see a note above the question mark for what reason. You can edit rejected Ad and submit again for re-moderation.
To save time and speed up moderation please review Images and Text Guidelines OK & BAD and Web Site / Landing Page guidelines
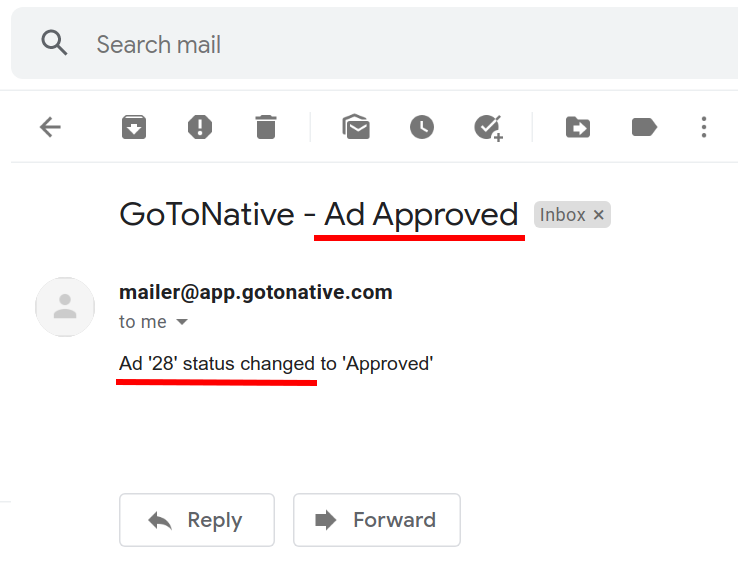
You would get notified via email as well.
You don’t have to wait for your Ad to be moderated (approved or disapproved) to add another one. Feel free to add more Ads and save time because they will be moderated all at once.
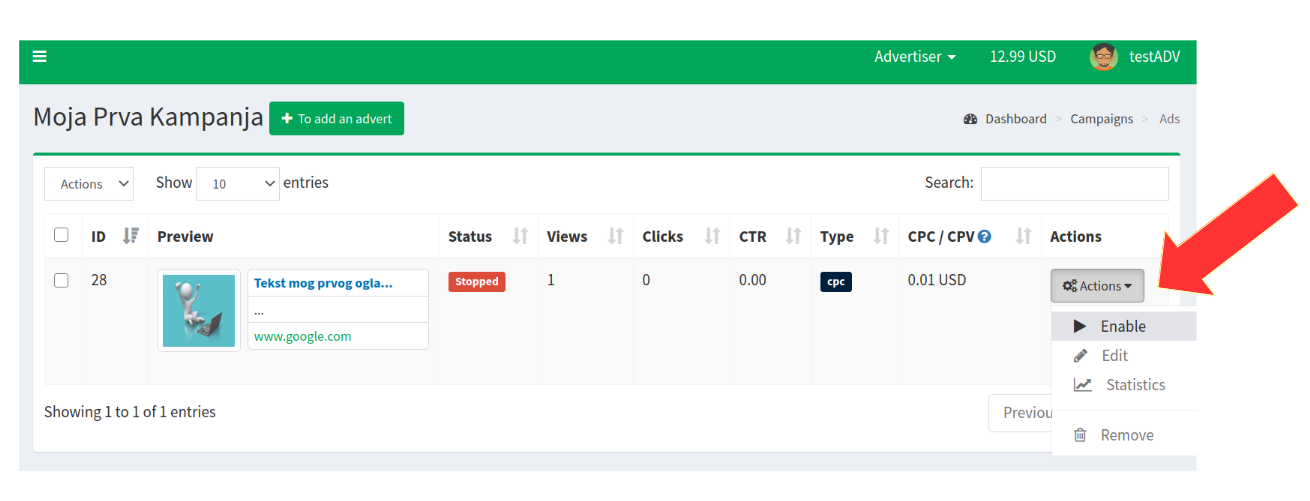
From Ad ACTIONS menu you can pause, reactivate, edit, view statistics, or remove Ads individually.
Approved ad(s) will start running immediately if you have money on the advertiser’s balance. If you do not have money on the advertiser’s balance, you need to top up your balance first in order to get traffic.
In order for your ads to start running, the last step is to top up your advertising balance, so let’s move to the final STEP 3 – How to add funds to advertiser’s balance?